Sunday, December 5, 2010

I wanted to let you know that I am now a guest blogger for my client Kimberly Hartke, publicist for the Weston A. Price Foundation. Hartke is Online! welcomes guest bloggers who have an interest in our mission of promoting WAPF dietary guidelines, small traditional farms, and safe raw milk.

I write for her just about every week or so, and she's even hooked me up with my very own guest blogger page.

So far I've been posting the recipes that I cooked for a recent Nourishing Traditions dinner at Harke's house to celebrate Dr. Joseph Mercola and Sally Fallon Morell.

On Kimberly's blog you'll find the recipes for the two gluten-free delights posted below: almond flour shortbread and cheesy rosemary almond flour crackers.


Sunday, October 17, 2010


Over Columbus Day weekend I went up to Vermont with two friends for a foodie tour. I brought home a ton of great Vermont food: Dreuxmanna spelt crackers, Wood's Boiled Cider, and of course maple syrup! While I was in Vermont, I wasn't surprised to find that the salads and vegetable side dishes stole the show. Here is a very easy side dish that is inspired by my trip to Vermont:

Roasted Butternut Squash with Maple Syrup and Brown Butter

-Halve and seed the butternut squash. Place the cut side down on a sheet pan and roast in a 400 degree oven until soft, about 30 minutes.
-Heat some butter over medium heat until it turns brown and gives off a nutty aroma. Remove from heat and set aside.
-Scoop out the soft flesh into a large bowl and mash with a fork.
-Add brown butter, maple syrup and some salt and pepper to taste.

Sunday, September 19, 2010

Roasted Eggplant & Tomato Soup

I received my last farm share of the season in the middle of September, but I'm still working my way through an assortment of peppers a month later. Can you believe they're still in great condition? Just as Farmer John suggested, I kept the peppers in the plastic produce bag that they came in and stored them in the fridge.

In case anyone is still with me, I thought I'd let you know that I will continue to post recipes and ideas on this blog. I hope to keep feeding you simple and practical ways to use up your produce, especially the ones you're not so familiar with. I'll also share some inspiration from my personal chef clients, like the awesome recipes I cook from the Specific Carbohydrate Diet (no grains, big emphasis on almond flour to make "breads") and the nourishing whole-foods based recipes I cook for a good number of my clients.

Please let me know what you would like to learn how to prepare- either by commenting here or contacting me on my Facebook business page:

Thanks for following me :)
-Victoria


Here's a soup that you hardly need a recipe for. It's a unique combination that makes great use of eggplant and tomatoes.

Roasted Tomato & Eggplant Soup

-Cut an eggplant in half and score the flesh in a criss-cross pattern. Halve some fresh tomatoes. Brush the eggplant and tomatoes with olive oil, salt and pepper. Place both on a sheet-pan, flesh side down. Roast at 375 degrees until both are soft, 20 to 30 minutes. Scoop out the flesh of the eggplant.
-Rough cut an onion (no fancy cuts needed here since you will later puree this soup) and cook it in a large sauce pan with some olive oil or butter over medium heat. Add some minced garlic and fresh herbs like thyme and oregano if you'd like. Sprinkle on some salt and pepper.
-Once the onion is soft, add the eggplant and tomatoes to the sauce pan. Let them cook for a few minutes and then add enough vegetable or chicken stock to cover. Keep some extra stock on hand to thin out the soup later, if necessary.
-Bring the soup to a boil and then simmer gently until all the vegetables are soft. Sprinkle in some salt and pepper.
-Puree the soup until very smooth and add cream or stock as desired. Add salt and pepper if needed. Garnish with basil.

Last farm share of the season :( Watermelon popsicles and homemade salsa


This week I received the last share of the season. Sigh! (Ugh, I wrote this post in the middle of September. Sorry, just posting it now.)


Most of the produce included in the last few shares has a long shelf-life, something I'm so thankful for since over the past month I've been busy cooking for people other than myself (and my family).


However, collecting a few batches of the same type of produce suits me well, since when I do cook at home, I like to cook in large batches and then freeze most of it. See, I personally support the personal chef method!


Here is what has been included in the farm share lately:


butternut squash

eggplant

beets

scallions

green beans

tomatoes

sweet corn

new potatoes

peppers- a colorful assortment of mild and spicy


Below are a few things I've prepared in the past month with the farmshare:


Salsa made with Graceland farm bell peppers, jalapenos, and tomatoes, along with some of the orange tomatoes from my garden.

Watermelon popsicles: puree a seeded watermelon in a blender, maybe add a little water, and freeze in molds. No need to add any sweetener for my two-year old, but a little honey and vanilla would suit my taste. An added bonus is that these popsicles take a while for my son to eat.


Monday, August 9, 2010

Panzanella Salad


Panzanella
salad is such a treat this time of year!

All I do is:
  • chop up some tomatoes
  • add chopped cucumbers or onions if you'd like
  • sprinkle on some salt and pepper
  • sprinkle on some chopped basil
  • toss with vinaigrette- I used balsamic vinaigrette
  • toss mixture with homemade croutons or spoon over crostini
  • finish with a little sea salt, more black pepper and a little good olive oil

homemade croutons
  • slice a baguette into cubes (excellent way to use up day-old bread)
  • spray on a little olive oil (preferably a spray bottle that you fill up)
  • sprinkle with salt and pepper
  • bake at 400 degrees until golden
This photo does not do this delicious salad any justice. I took the photo in the ultra bright sunlight at mid-day which washed out the vivid orange and red color of the heirloom tomatoes. I made this salad for lunch and then made it again for dinner with my family.

Sunday, August 1, 2010

Week 15: Share Contents & Whole Foods Cost Comparison

Below are the contents of my farm share this past week. It's quite clear that it's the height of summer.

While shopping for a client at Whole Foods this week, I jotted down how much each of these items would have cost there. Based on my estimates, this farm share would have cost me $49.47 at Whole Foods, but because I am a member of a CSA, I only paid $29.11 ($25.88 per week for the produce and $3.23 per week for the eggs). That's a savings of $20.36!

Not only did I save $20.36,
  • I received a larger watermelon than the ones sold at Whole Foods
  • I received better quality basil than what is sold at Whole Foods, and paid less for it
  • I didn't have to drive to the grocery store
  • I didn't have to spend time thinking about what vegetables to buy and pondering their origins, price, freshness and seasonality.
  • I didn't have to load the vegetables into a dirty grocery cart, unload them onto a dirty cashier belt, load them into my car, only to unload them once I got home.
  • I also saved fuel resources because my farmer only had to drive 18.5 miles to deliver the produce to my neighborhood, and I only had to drive 3 miles from my house to pick it up.
  • I supported a local farmer and my local economy.
  • I taught my two-year old that good food comes from a farmer, although I'm afraid he gets confused at pick-up and might think that the house we go to is the actual farm.
This week's farm share and what each item would cost at Whole Foods:

A big watermelon= $5 (Graceland Farm's watermelon was much larger than the ones at WF)
6 large heirloom tomatoes $4.99/lb = $15 (each tomato weighs about a half pound)
2 pints of cherry tomatoes $3.99/ pt= $7.98
7 small peppers $3.99/ lb = $3
large bunch of basil $2.50 per dinky plant = $5
2 cucumbers- $.75 each = $1.50
4 Japanese eggplants- $4.99/lb = $4.99
6 ears of corn- $.50 each = $3.00
& a dozen farm eggs- forgot to check, but somewhere around $4

Total: $49.47

Corn Fritters

When I have corn on hand, I usually steam or boil it, take it off the cob, and toss it with vinaigrette and crunchy vegetables to make a light side dish. Corn salad is great, but now I'm on a corn fritter kick. I've made this recipe twice in one week, and so far I've found that no one turns down the offer of a corn fritter. Once again, it's a Cooks Illustrated recipe.


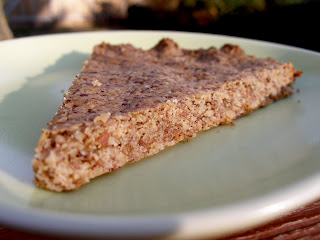
CORN FRITTERS WITH CHEDDAR AND CHIVES


Makes 12 fritters. Published November 3, 2006.

Tangy cheddar cheese partners well with the corn and flecks of green chives give the fritters a light, oniony flavor.

1 ½ pounds fresh corn (2 large or 3 to 4 medium ears), husks and silk removed

1 large egg , beaten lightly

3 tablespoons all-purpose flour

3 tablespoons cornmeal

2 tablespoons heavy cream

1 small shallot , minced

1/2 teaspoon table salt

Pinch cayenne pepper

1/3 cup shredded cheddar cheese

2 tablespoons minced fresh chives

1 teaspoon Dijon mustard

½ cup corn oil or vegetable oil, or more as needed

INSTRUCTIONS

1.Using chef’s knife, cut kernels from 1 to 2 ears corn and place in bowl (you should have about 1 cup whole kernels). Grate kernels from remaining 1 to 2 ears on large holes of box grater (you should have generous 1/2 cup grated kernels) into bowl with cut kernels. Using back of knife, scrape any pulp remaining on all cobs into bowl. Stir in egg, flour, cornmeal, cream, shallot, salt, cayenne, cheese, chives, and mustard to form a thick batter.


2.Heat oil in large heavy-bottomed, nonstick skillet over medium-high heat until shimmering. Drop 6 heaping tablespoonfuls batter in pan. Fry until golden brown, about 1 minute per side. Transfer fritters to plate lined with paper towels. If necessary, add more oil to skillet and heat until shimmering; fry remaining batter. Serve fritters immediately.

Monday, July 26, 2010

Pizza Margherita with Cherry Tomatoes


We still eat pizza very often in my household. Pictured above is a simple, yet delicious Pizza Margherita. I almost forgot to incorporate the cherry tomatoes, so I just sprinkled them on top after baking the pizza.

Here's the same pizza dough recipe that I posted in April, it's still my favorite. I like the author's tomato sauce too, but to make things even simpler, I often just:
  • saute minced fresh garlic in olive oil
  • add a can of diced tomatoes
  • simmer for a few minutes
  • season with salt and pepper
  • add fresh torn basil
With a sauce that simple, there's no excuse not to make your own.

If you want to make pizza at home, I suggest purchasing:
  • a pizza peel
  • a pizza stone
  • corn meal to sprinkle on the peel and stone to prevent the dough from sticking
Once you make the dough, you can:
  • use it right away to form into a pizza crust
  • form it into a ball and store it in the fridge or freezer
  • form it into a pizza crust and freeze it uncooked
  • form it into a pizza crust, parbake it, and then freeze it
I like this blogger's technique for parbaking pizza crusts.

Summer Vegetable Gratin (my new favorite dish!)


Photo: Summer Vegetable Gratin, double stacked

If you like:
  • zucchini
  • yellow squash
  • caramelized onions
  • crunchy Parmesan breadcrumbs
...you will LOVE this dish because it's:
  • a great way to use up summer vegetables
  • fairly light and very nutritious
  • very comforting to eat
I can easily eat the entire casserole within three meals.

With most Cooks Illustrated recipes you have to pay a subscription to gain access, but fortunately this recipe is open to the public. Enjoy!

Photo: Summer Vegetable Gratin, right out of the oven

Thursday, July 22, 2010

Week 14: Share Contents and Usage Summary

  • Sweet Corn- corn fritters
  • Shiitake mushrooms
  • Cucumbers- sliced
  • Cabbage- shredded with carrots, tossed in sweet vinaigrette for slaw
  • Heirloom tomatoes- in Summer Vegetable Gratin
  • Cherry / Salad tomatoes- on pizza; inside soft flour tortilla with bacon, cheddar & Sriracha, with garlic, basil and mozzarella over bruschetta
  • Melon- I didn't actually receive a melon :(


In his weekly CSA newsletter, Farmer John Wright posted these helpful tomato tips:

1) Always store the tomatoes on their shoulders.

This is upside-down to most. The shoulders are

much firmer and greener and can bear the weight

of the fruit (especially larger) tomatoes

without bruising.

2) Generally, try to leave your tomatoes at room

temperature, to ripen properly and hold the best

flavor. Once they are fully ripened, or are beginning

to soften, or if you have not used an entire large tomato,

then refrigerate.

3) Those pesky green shoulders. There is just no

avoiding the green tops on some "heirloom"

tomato varieties. If you wait for all of the green

to ripen the majority of the fruit may become too soft.

In general, the pink, purple and brown tomatoes hold on to

their green shoulders a little longer than others.

You have to rely on giving the bottom of the tomato a

very gentle squeeze, when you feel a little 'give' your

tomato is ripe.


Farm-Fresh Egg and Sausage Strata


Above is my adaptation of the recipe below for Sausage and Cheddar Cheese Strata found in
Bride & Groom First and Forever Cookbook by Mary Corpening Barber and Sara Corpening Whiteford. There are so many great turn-to recipes in this cookbook. The buttermilk "Pancakes with Melted Berries" immediately come to mind.

I used eggs from Graceland Farm, Wellshire Farms Turkey Breakfast links and I added caramelized onions and some minced light green medium-heat small peppers (not sure of the name).

Sausage and Cheddar Cheese Strata
Serves 8 to 10

One of our favorite weekend get-togethers that we ever hosted was a "Breakfast for Dinner" party where everyone brought his or her favorite breakfast casserole. We all shared and tasted numerous version- some were prepared with Jiffy cornbread mix, others featured grits and white bread. Some came topped with Swiss cheese, others with Cheddar, and even a few were made with Kraft singles! Our friend Lucy Bowen Taylor brought the winning recipe, which got rave reviews for its creamy, souffle-like texture. Our adaptation of Lucy's strata has become a staple in our households. Make this for Saturday brunch and freeze the leftovers in squares for weekday breakfasts.

1.5 pounds ground breakfast sausage
(12 ounces hot, 12 ounces regular)
4 eggs, beaten
2.5 cups half and half
1 tsp dried sage
3/4 tsp kosher salt
1/4 tsp freshly ground pepper
6 potato bread or other soft white bread slices, brusts removed
2 cups (6 ounces grated extra sharp cheddar cheese
2 tbsp chopped fresh chives, flat leaf parsley, or green onion, both white and green parts

  • Preheat the oven to 350 degrees F. Butter a 9-by-13-by-2-inch baking dish.
  • Heat a large skillet over medium-high heat. Put the sausage in the skillet and cook, stirring occasionally, until it is thoroughly browned, 5 to 7 minutes. Using a slotted spoon, transfer the sausage to a paper towel-lined plate to drain.
  • Whisk together the eggs, half-and-half, sage, kosher salt, and pepper in a medium bowl. Layer the bread in the prepared baking dish and top with the sausage. Pour the egg mixture over the sausage and top with the cheese. Bake until the strate is set in the middle, about 30 minutes. Do not overcook. Let cool for 15 to 20 minutes. Garnish with the chives just before serving.


Week 13 Share Contents & Usage Summary


  • tomatoes- on Caprese sandwiches (see above), cut up for a simple side dish with just salt and pepper
  • corn- boiled, taken off the cob, tossed with cherry tomatoes and apple cider vinegar
  • cucumbers- sliced for a simple side dish with just salt and pepper
  • new potatoes- boiled, tossed with olive oil, crisped under broiler, shredded cheddar and minced light-green medium-spiced pepper on top (not sure of its name)
  • variety of small peppers- on cheesy potatoes, in guacamole

Week 12 Share Contents & Usage Summary


  • Scallions- in corn salad
  • Squash- tossed in olive oil, broiled until lightly spotted brown
  • Cucumbers- eaten sliced with a little salt and pepper
  • Tomatoes- Caprese salad
  • New Potatoes ( Red Pontiac )- steamed, tossed with olive oil, crisped in toaster oven, tossed with herbs
  • Swiss Chard- quick sautee with olive oil and minced garlic
  • Sweet Corn- boiled, taken off the cob, tossed with sliced scallions, purple basil, and a little white balsamic vinegar


The corn was so delicious. Farmer John Wright says it's called "Honey Select". When I take it off the cob (using a chef's knife), I try to keep the corn in chunks, but that was not possible with these small kernels.

Tuesday, July 6, 2010

The Official Beginning of Summer: TOMATOES are Ready!

The ripening of tomatoes marks the official beginning of summer in my household. We eat tomato, basil, and fresh mozzarella just about every day, in one form or another: in salads, in sandwiches, and in pasta. This dietary regime lasts from now until late October and we never get sick of it.

Caprese Salad: Summer on a Plate!

Tips:
Sprinkle sea salt and freshly ground black pepper onto all the tomato and mozzarella slices.
Drizzle on extra virgin olive oil and balsamic vinegar reduction (see below for method).
Store tomatoes at room temperature, never in the refrigerator.
Prevent your basil plant from forming flowers by picking leaves often.

How to make balsamic reduction:

(http://www.chron.com/disp/story.mpl/life/food/6956909.html)

...When making the glaze — also referred to as a reduction — use inexpensive balsamic vinegar.

Take a bottle of the vinegar, pour the contents into a saucepan and bring it to a boil. Lower the heat slightly and continue cooking the vinegar so it reduces down to a thick consistency. You need to keep an eye on the vinegar while it reduces. If it cooks down too quickly or too much, it can burn — and then you'd have to toss it and start over.

One bottle (16 to 17 ounces) should reduce to about a half cup. You don't have to reduce the entire bottle; you can reduce any amount. Once it's reduced, the flavor is concentrated, and the glaze should be just thick enough to coat the back of a spoon.

Small amounts of this sweet and tangy glaze — which is fat-free, by the way — go a long way. Keep it stored in a squeeze bottle in the refrigerator and use it to gussy up cooked meats, poultry, vegetables and even fruit. It's especially tasty drizzled on strawberries.

Quick SQUASH Parmesan

Here's something you can do with squash on a summer evening when you have a big appetite. It's summer comfort food! There really is squash under all that cheese in the photograph!

olive oil
small can crushed tomatoes
garlic, minced
basil
4 yellow or paddypan squash, sliced
mozzarella, shredded

In a small saucepan cook the garlic in olive oil over medium heat for 30 seconds. Add the crushed tomatoes, salt and pepper, and simmer gently until slightly thickened. Stir in chopped fresh basil.

While the sauce thickens, brush the squash with olive and sprinkle with salt and pepper. Broil until golden and spotted. Spray a small casserole with olive oil and layer in the broiled squash. Cover with tomato sauce, mozzarella cheese, and Parmesan. Place under the broiler until the mozzarella is spotted brown. Sprinkle with fresh basil and serve.